Introduction
After uploading Sites, the Administrator can manage the Sites in various ways.
- Organize Sites by Group
- Search Sites
- Change the sort order
- Make a Site Public
- Edit the Site name and description
- Delete a Site
- Display Sites thumbnails
Note: Certain functions are available ony while logged in as an Administrator or Power User.
Selecting a Site: If you select with the mouse cursor in the white space of a Site listing, it activates the editing controls. You can use these edit controls to manage the Site attributes. See image below.

Organizing Sites by Group

Each Site can be associated with a group name. By default the list of available Sites is organized by group. You can easily change the group name for each Site by entering a new group name in the Move To text field available when
you select a Site.
Note You can type a name of a group that does not yet exists and the group will be created automatically.
Searching Sites
By hitting the Search button you can enter a keyword and filter the list of Sites in the current page. The search happens as soon as you enter at least 3 charcters in the search box. Every character you enter after that will filter the list automatically.
Sorting the Site list
To sort sites alphabetically, first switch to the un-grouped view and then select the sort button to arrange sites A to Z or Z to A.

When in List Mode you will see the sorting menu appear in the top right bar. With this menyu you can sort the list of Sites by Name, by Group and by Creation Date (in Ascending and Descending order).
Making Sites public
You can make a Site public (i.e accessible by anonymous users) and feature the Site in the welcome page (if enabled).
To make a Site public select a Site and hit the Share button.
Users can also embed a TruView within a page using the script provided. Set the desired width and height of the viewing window and select whether to show or hide the tools bar and Minimap features.

Note Public Site will appear in the Welcome page of your TruView Enterprise site only if your administrator has enabled this feature.
Editing the Site name and description
You can change a Site title and description. The description is important when you share the Site to the public as it may appears on the Welcome page.
To edit a Site title and descrioption select a Site and hit the Edit button.

Deleting a Site
Delete a Site will remove all the Setups from the TruView Enterprise database along with all the associated data such as Markup, measurements and uploaded files.

Warning!
Deleting a file cannot be undone. Once the Site is deleted all its data are lost and cannot be recovered.
A better way to make a Site invisible to users is to create a Portal with access to a Administrators only and to move a Site to the new Portal.
Display Site thumbnails
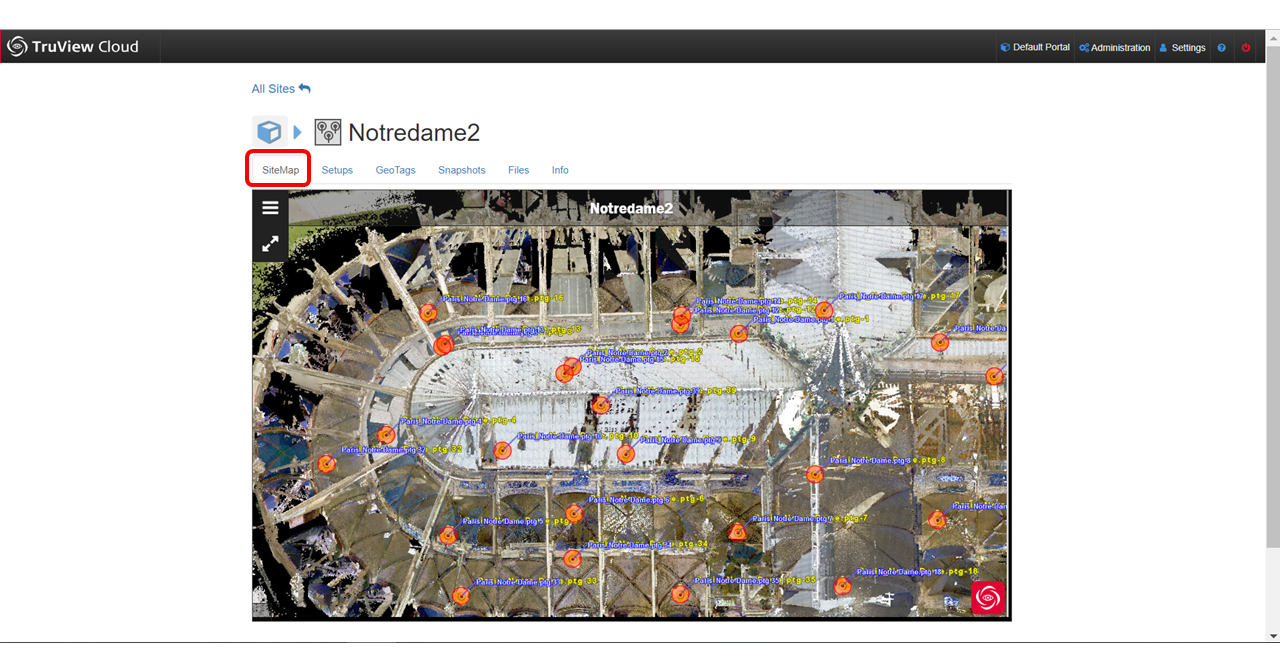
You can switch the Site list to display SiteMap thumbnails of each Site project. Your choice will be remembered by the browser, so next time you enter the Site list the last view mode will be reused.

Back to the Top
Organizing Sites by Group
After selecting a Site in the table you can enter a Group name to move the Site into an existing or new Group. After entering the Group name use the "Move to" button finish the action. See image below.

Drag and Placement of Sites
You can left and and drag Sites into another group to move the Site.
- Left click on the Site icon or Site name and drag Site into the name of the new group.
During move:

After Move:

Back to the Top
About Public Sites and Anonymous Users
Public Sites are Sites that have been "made public" such that they will allow users to visit with no login. These special no login visitors are called "Anonymous" users. These users are restricted in several ways.
- The "All Sites" page is not accessible without a login, so Anonymous users cannot see the total list of projects.
- Therefore, if a Site is to be set as a Public Site, you will need to send the url of that specific Site to anyone you wish to be able to visit it anonymously.
- You could of course add a link to a Public Site from any other webpage, etc.
- To get the url of a Public Site simply visit the Site after making it Public (as described below) and copy the url from the browser address bar.
- Anonymous users are "Read Only" users so they will not have access to the Markup tools.
Public Sites are also accessible by Login Users and Administrator Users. They remain listed in the All Sites listing in their respective Groups.
Back to the Top
Publish or Un-Publish a Public Site
To set a Site as a Public Site, activate the Site editing tools and select the Public/Private icon. To make a Site Private, which is currently Public, activate the Site editing tools and you will see the icon has changed to show the Site is Public.
Simply select the icon and it will make the Site Private.
After making a Site Private, the links to that Site will no longer be active and no-one can access the Site via those previously available links.
When you make a Site Public, you are asked to confirm your action and given the opportunity to change the description text as shown in this dialog box.
When a Site has been made Public, the Site Icon next to the name changes to indicate the Public status.


Back to the Top
Setting a Site Name and Description
To edit the name and description of a Site, select the Edit Site icon after enabling the editing tools for the Site.
After selecting the Edit Site icon you will see the following dialog box where you can change the Site name and the description.
Back to the Top